
How to Fit a Bath: Step-by-Step UK Homeowner Guide
Fitting a new bath can look like a simple weekend job. Then you remove the old one and find that the waste does not line up. The floor is uneven, or the new bath sits differently from the old one.
Now the job involves more than fitting the bath.
We often find that the biggest problems come from poor preparation. A bath needs the right support, accurate levelling and secure plumbing connections. The surrounding walls, finished floor and access for future repairs also need consideration.
So, how do you fit a bath without creating problems later?
In this guide, we will walk you through the process step by step. We will cover what to check before you start, how to position and level the bath, how to deal with the plumbing and when it makes sense to bring in a professional.
What Do You Need to Fit a Bath?
Before we start, we make sure the right tools and fittings are ready.
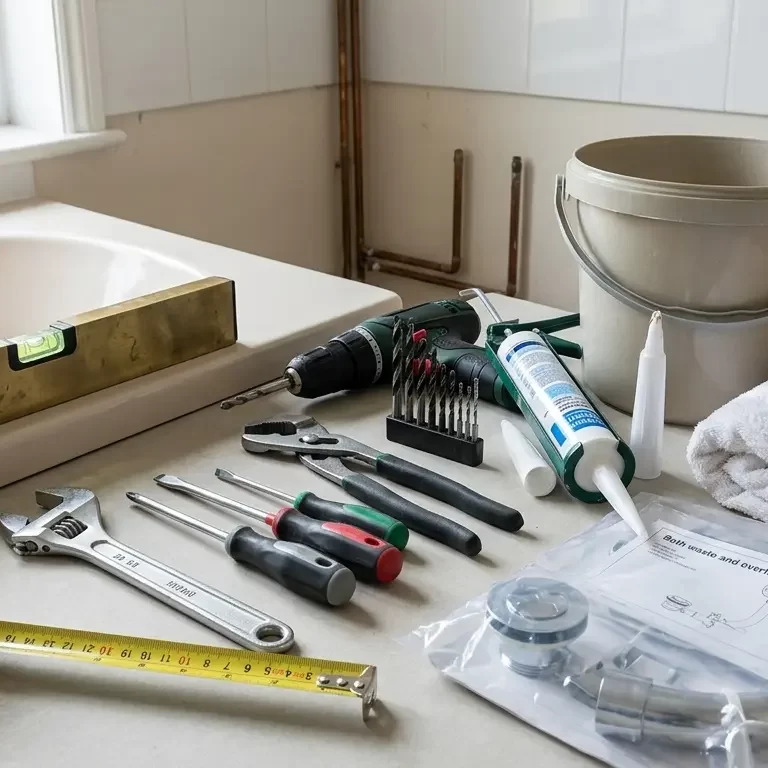
The exact requirements depend on the bath and the existing plumbing. However, you may need:
- Measuring Tape
- Spirit level
- Adjustable wrench
- Screwdrivers
- Drill and suitable bits
- Pipe grips
- Sealant gun
- Bathroom-grade silicone
- Bucket
- Towels or cloths
- Suitable bath waste and overflow fittings
We also keep the manufacturer's installation instructions nearby.
Not every bath is fitted in the same way. Some use adjustable feet. Others need a support frame or additional fixing points.
Checking these details before starting can prevent problems later.
Before You Fit the Bath
This is the part of the job that is easy to overlook.
Imagine taking the old bath out, bringing the new one upstairs and getting it into position. Then you discover that the waste outlet does not line up with the existing pipe.
Now the job has become a plumbing job too. That is why we always start with the space and existing services. Measure the area carefully. Check the length, width and height available for the new bath.
Then look at the plumbing.
Check where is the water supply pipes? Where does the waste run? Will the new bath waste connect to it without putting pressure on the pipework?
We also check the floor and surrounding walls.
If the floor is uneven or the wall has been damaged by an old leak, it is better to deal with that before fitting the new bath.
Once the old bath is removed, check for:
- Water damage
- Damp areas
- Loose flooring
- Damaged pipework
- Old sealant
- Signs of previous leaks
A new bath should not be used to cover an old problem.
How to Fit a Bath Step By Step?
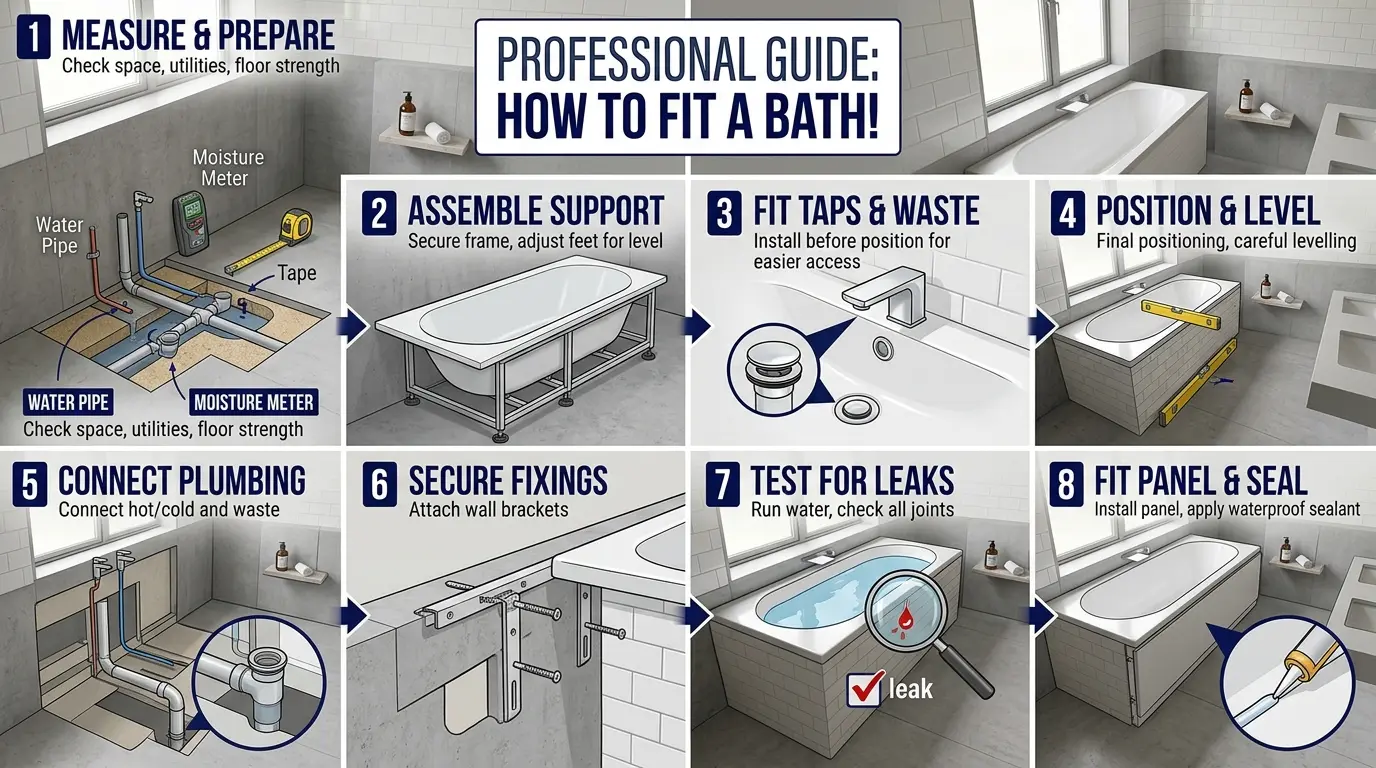
The exact process depends on the bath you have chosen. However, most installations follow the same basic stages.
1. Remove the Old Bath
Start by turning off the water supply. Disconnect the taps and waste connections before removing the old bath. Take care when moving it. Some baths are much heavier than they look. Once the old bath is out, clean the area properly.
This is when hidden problems often become visible. We may find old sealant, damaged flooring or signs of a previous leak.
Deal with those issues before bringing the new bath into position. It is much easier to repair the area now than after the new bath has been installed.
2. Assemble the Bath Support
The bath needs a stable support system. Depending on the model, this could be adjustable feet, a frame or another support method supplied by the manufacturer.
Follow the manufacturer's instructions carefully.
Position the supports where they are designed to go. They need to carry the weight of the bath and the water inside it. A bath should not move when someone gets in or out. This matters because movement can put pressure on the waste connections and cause the seal around the bath to fail.
3. Fit the Taps and Waste
The best time to fit the taps and waste depends on the bath design and the available access.
Sometimes it is easier to connect these parts before the bath reaches its final position. The waste and overflow need to be fitted with the correct seals. Make sure the connections are secure, but avoid overtightening them. A damaged seal can create a leak just as easily as a loose connection.
We also check the existing waste pipe before connecting it. If it does not line up with the new bath, do not force it into place. The pipework may need to be adjusted.
4. Position the Bath
Now the bath can be moved into position. This is where all those earlier measurements become important. Check the distance from the walls and make sure the bath sits correctly within the available space.
Think about the finished bathroom too. If you are going to tile the walls or fit a bath panel, the final position needs to work with those finishes. Moving the bath a few centimetres now is easy.
Trying to move it after the surrounding tiles have been finished is a very different job.
5. Level the Bath
A bath can look level without actually being level. That is why we use a spirit level. Check the bath along its length and across its width. If it has adjustable feet, make small adjustments until it sits correctly.
We also make sure the bath is stable once the adjustments are complete. Do not rush this stage. Getting the bath level and secure now makes the plumbing and finishing stages much easier.
6. Connect the Plumbing
Once the bath is in the correct position, connect the water supply and waste pipework. The connections should sit naturally without unnecessary strain. Check the waste carefully and make sure the overflow is connected correctly. This is also where a simple bath replacement can become more complicated.
If the new bath has a different waste position or the water supply needs moving, the existing plumbing may need to be altered. That work should be planned before the bath is finally secured.
7. Secure the Bath
Once everything is correctly positioned, secure the bath according to the manufacturer's instructions. Some baths require wall fixings or additional support. The important thing is to make sure the bath cannot move during normal use.
This is not something we leave until the end. A bath that moves can eventually affect the plumbing connections and the seal around the edges.
8. Test Everything for Leaks
This is one stage we never want to rush. Before fitting the final bath panel or applying the last seal, test the installation. Run water through the taps. Check the waste. Test the overflow.
Then fill the bath and inspect the accessible connections underneath. Look for even small signs of water. If there is a leak, it is much easier to fix while everything is still accessible. Once the plumbing has passed the test, we can move on to the final finishing work.
9. Fit the Bath Panel and Seal
The final stage is to finish around the bath. The bath panel should fit neatly and leave suitable access where needed. Then the surrounding edges can be sealed with a suitable bathroom sealant.
The surfaces need to be clean and dry before applying the sealant. A neat seal helps stop water getting behind the bath and into areas where it can cause damage.
Always follow the sealant manufacturer's curing instructions before using the bath.
Does the Type of Bath Change the Installation?
Yes. Different bath styles present unique installation requirements:
-
Acrylic Baths: Lightweight and flexible; require careful leg set alignment and wall fixing brackets to ensure stability.
-
Steel Baths: Heavier and rigid; often require specific heavy-duty support feet and solid floor foundations.
-
Freestanding Baths: Require precise underfloor plumbing for waste outlets and often involve floor-mounted or wall-mounted tall taps.
-
Shower Baths: Require reinforced base support near the standing area and precise alignment for glass shower screens.
How Easy is it to Fit a Bath?
That depends on the bathroom. Replacing a bath in exactly the same position can be relatively straightforward. The job becomes more involved when the layout changes. Moving the bath may mean moving water pipes and waste pipework. You may also need to adjust the floor, walls or surrounding tiles.
Access can be another issue. A bath might fit perfectly in the planned space but still be difficult to move through a narrow doorway or upstairs landing.
If you are comfortable with plumbing and DIY work, you may be able to handle a straightforward replacement. However, if the installation involves moving pipework or repairing the bathroom, professional help can save time and prevent costly mistakes.
How Long Does it Take to Fit a Bath?
It totally depends on if you're doing it yourself or if you are getting it done by professionals.
A simple replacement can take less time than an installation that involves new pipework or repairs.
The condition of the bathroom also matters. For example, removing an old bath might reveal damaged flooring or an old leak. That issue needs to be resolved before the new bath can be fitted.
The same applies if the bath is being moved to a new position. When the bath forms part of a complete bathroom project, the installation also needs to fit around plumbing, tiling, flooring and decorating.
We therefore look at the whole bathroom before estimating how long the work should take.
Common Mistakes When Fitting a Bath
-
Skipping the Spirit Level: Guessing by eye leads to poor drainage and uneven water levels.
-
Sealing Before Water Testing: Finding a small waste drip after the bath panel is sealed creates double the work.
-
Forgetting Access Points: Sealing off access to the waste trap makes future plumbing checks or clearing blockages needlessly difficult.
-
Using Standard Silicone: Always use dedicated sanitary/bathroom silicone containing fungicides to prevent mould growth.
When Should You Get a Professional to Fit a Bath?
A straightforward bath replacement may be suitable for someone with good DIY skills.
However, we would recommend getting professional help when the installation involves more than replacing the bath itself.
This can include:
- Moving the bath to another position
- Changing waste pipework
- Altering water supply pipes
- Repairing damaged flooring
- Replacing surrounding tiles
- Fixing an existing leak
- Installing a bath as part of a complete bathroom remodel
- Coordinating several bathroom trades
Electrical work also needs particular care in a bathroom. Always use a suitably qualified professional where electrical installation is required.
If you are unsure about the plumbing or drainage, getting the installation assessed before starting can prevent bigger problems later.
Professional Bath Fitting in Rugby and Surrounding Areas
A new bath is often only one part of a bathroom project.
Once the layout changes, you may also need plumbing, tiling, plastering, decorating or electrical work. DM Bathrooms provides bathroom design, supply and installation from its base in Rugby.
The team can manage the different parts of a bathroom project, including plumbing, tiling, plastering, electrical work, carpentry and decorating. DM Bathrooms also serves Rugby, Warwickshire and surrounding areas, including Leicestershire, Oxfordshire, Northamptonshire and the West Midlands.
Planning these jobs together can make the installation more straightforward. It also means the bath, plumbing and surrounding finishes can be considered as one complete project.
Need Help Fitting Your New Bath?
A bath installation involves more than getting the bath into position. The support, plumbing, drainage, level and surrounding finishes all need to work together.
If you are planning a new bath in Rugby or the surrounding areas, we can help you plan the installation from the start. DM Bathrooms can also manage the wider bathroom work, including plumbing, tiling, decorating and other trades required for the project.
Get in touch with DM Bathrooms to discuss your bathroom project and find out what your installation involves.
Frequently Asked Questions
You May Also Read..
-
Small Bathroom Ideas for UK Homes
If your bathroom is small, you probably know the problem already. There never seems to be quite enough room. The…